How to Install and Run ClickHouse
5 minutes
96
Note: This guide is written using Ubuntu 22.04 LTS.
When you have big data to work with, whether you are creating an IT project from scratch or looking for an alternative to your current set-up, you will need to decide which database to choose. The popular choice at the moment is ClickHouse.
It’s a fast open-source management system for column-oriented databases that ensures online analytical processing and produces data reports in real-time using SQL queries, including complex queries.
So, if you’re looking for a powerful column-oriented database that can handle large volumes of data, consider using ClickHouse as your analytic DBMS of choice. In this tutorial, you’ll learn how to install the ClickHouse server and client on your machine.
Why Use ClickHouse on Amazon Web Services
While there are serverless solutions for using ClickHouse, some prefer to deploy the tools on their own server. Not everyone is able or willing to purchase hardware to create and maintain their own server to use ClickHouse, so renting virtual servers is a popular solution these days. One of the largest providers of such services is Amazon Web Services (AWS).
For this process, you don’t need to have a lot of things at hand – you just need to create an account on AWS and set up the suitable machine.
Below, we will describe how to deploy ClickHouse on your AWS server.
How to Run and Install ClickHouse: A Step-by-Step Guide
For convenience, we’ve divided instructions into four parts.
Part 1. Repository
- Connect to your Amazon EC2instance.
- Add the GPG repository key so that you can securely download the latest ClickHouse verified packages:
sudo apt-key adv --keyserver hkp://keyserver.ubuntu.com:80 --recv 8919F6BD2B48D754 - Add the ClickHouse repository:
echo "deb https://packages.clickhouse.com/deb stable main" | sudo tee /etc/apt/sources.list.d/clickhouse.list - Update the packages information:
sudo apt update
Part 2. ClickHouse Server Installation
- Install the ClickHouse server and ClickHouse client with the following command:
sudo apt-get install clickhouse-server clickhouse-client - During the installation process, enter the password for the default user (optional step):
- After successful installation, start the ClickHouse server first and then the ClickHouse client, according to the advice in the output of the previous command:
sudo clickhouse startclickhouse-client --password
Note:--passwordflag should not be entered if you did not set a password in step 2.2
Part 3. Using Clickhouse Server
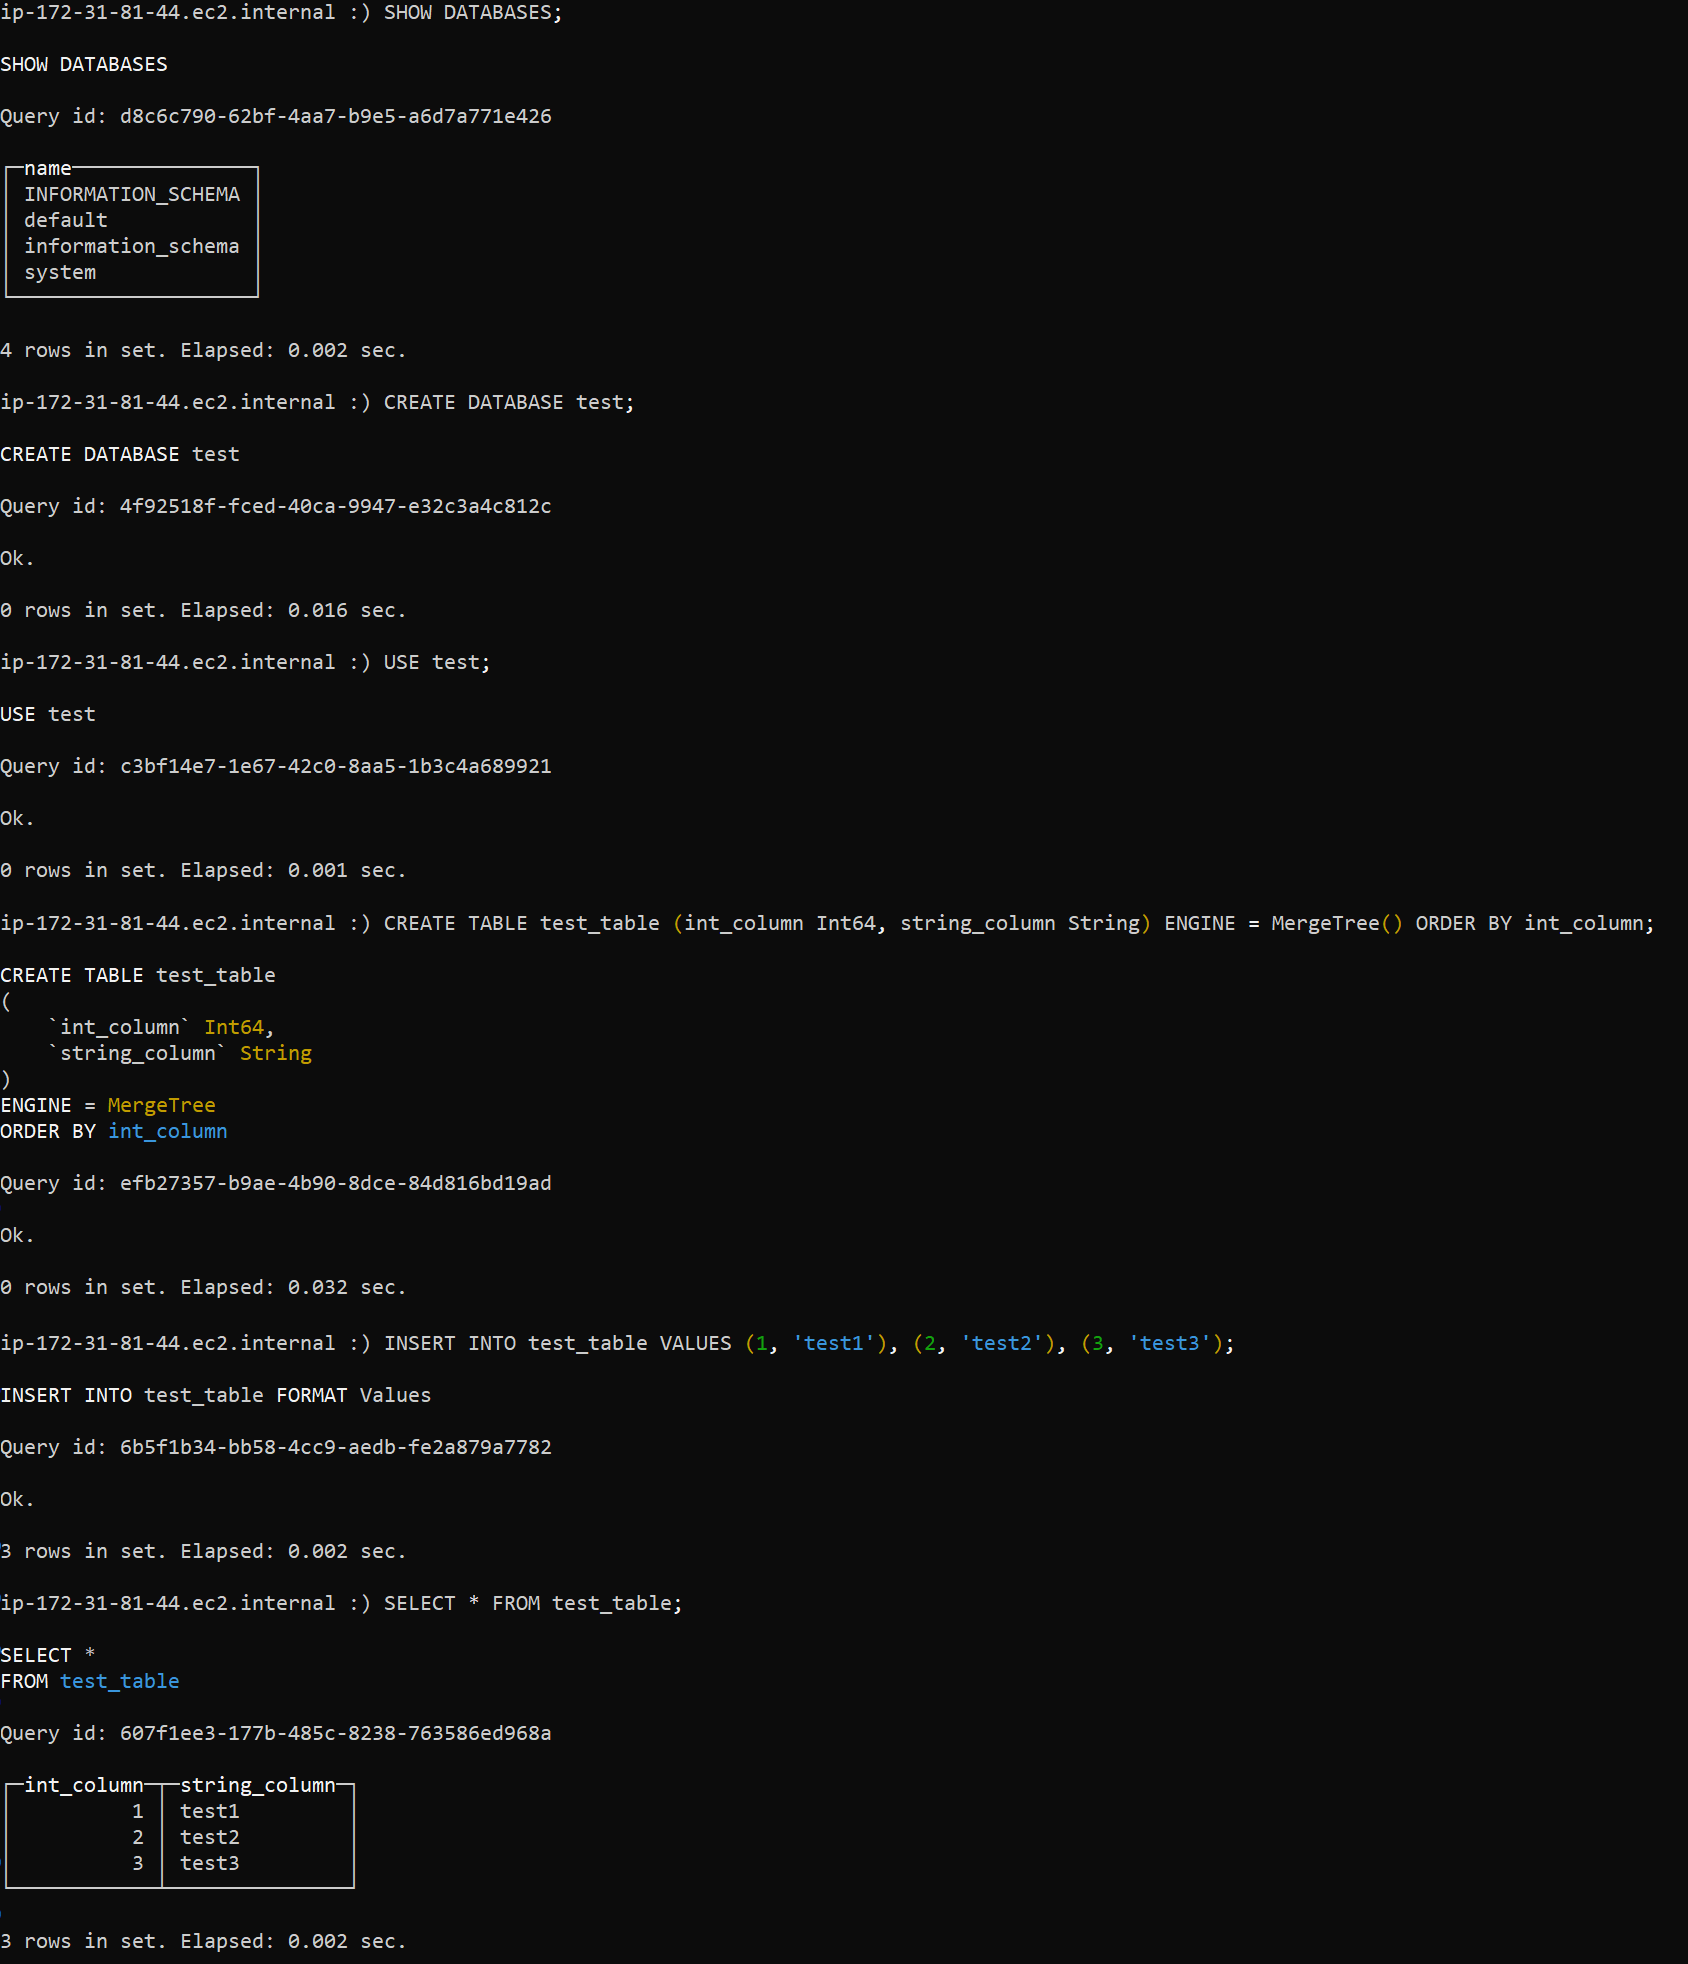
- Next, we can look at the list of databases, create a new one, select it, create a table, fill it in, and see the results:
SHOW DATABASES;CREATE DATABASE test;USE test;CREATE TABLE test_table (int_column Int64, string_column String) ENGINE = MergeTree() ORDER BY int_column;INSERT INTO test_table VALUES (1, 'test1'), (2, 'test2'), (3, 'test3');SELECT * FROM test_table;
Part 4. Connections
- If you want to allow connecting to the ClickHouse server externally, uncomment the following line in the configuration file
/etc/clickhouse-server/config.xml(open it usingsudo):<!-- <listen_host>0.0.0.0</listen_host> -->(or this line<!-- <listen_host>::</listen_host> -->) - After that, you will need to restart the ClickHouse server with the following command:
sudo clickhouse restart - The ClickHouse server listens on port 8123 for HTTP connections and port 9000 for connections using
clickhouse-client. Let’s allow access to both ports for a specific IP or all at once (for example, by specifying0.0.0.0/32orany):sudo ufw allow from <ip>/32 to any port 8123
sudo ufw allow from <ip>/32 to any port 9000 - You also need to make sure that your machine on AWS has these ports open:
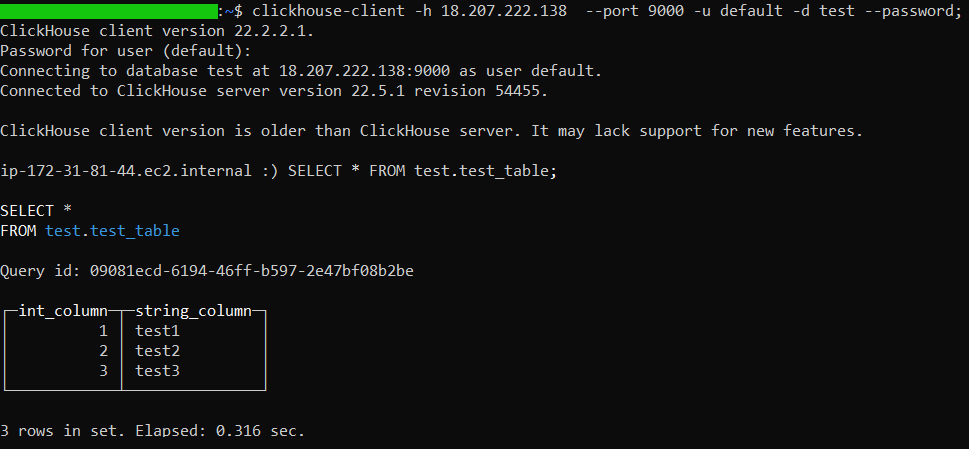
- Finally, you can connect to your server externally using
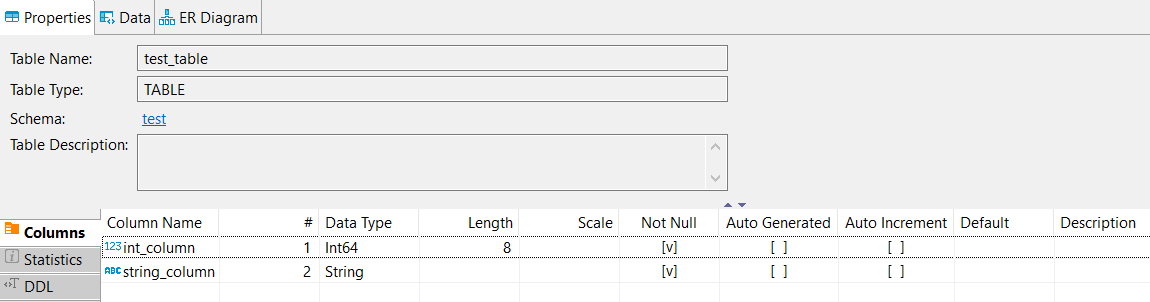
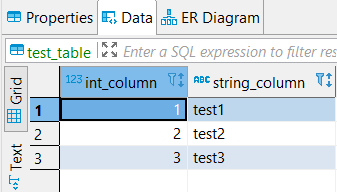
clickhouse-client: - Or alternatively, using DBeaver:
Congratulations! Now you have successfully installed a ClickHouse server that you can confidently use.
Troubleshooting and Other Considerations
Here are some major considerations:
Connection Issues
If you see a message about a broken connection, simply repeat the query. If that doesn’t help, check the server for logging errors. If you start the client with the logging trace parameter, ClickHouse returns the stack trace with an error description. Other self-managed ClickHouse troubleshooting instructions are available here.
If you don’t have a connection to a running ClickHouse service, you can use clickhouse-local, which opens up the ClickHouse features and functions.
How to Overcome a Small Amount of Ram Challenge?
To run ClickHouse on a smaller amount of RAM, manage the amount of data processed in queries. The size of temporary data can be estimated based on the operations you use (GROUP BY, DISTINCT, JOIN, etc.), which then allows you to calculate the required RAM.
Keep in mind that the minimum configurations were set during the installation process, so to use the ClickHouse server in production, you will most likely have to carry out additional configurations and use another processing configuration file (i.e., install ClickHouse with a different config file that in the example), taking into account the characteristics of your activity and your requirements for web analytics.
Takeaway
Hopefully, this guide will make it easier for you to get started with ClickHouse. We recommend following each step precisely to avoid potential issues when launching and operating ClickHouse.

We convert raw data into meanigful insights for you to make the best decisions.
Featured Articles
-

Top 5 Data Visualization Tools in 2023
A simplified representation of complex data is key for any data-driven business. Raw data must be turned into a cohesively formatted visual that is…
Read more -

SnowFlake: The Best Data Warehousing and Prescriptive Analytics Solution
Data Warehouse as a Service, or DWaaS, has gained much popularity in the past decade. It is a service primarily provided by Snowflake Inc,…
Read more -

Simple Mobile Analytical Stack: Firebase + BigQuery
Developing reliable and high-quality mobile and web applications requires a lot of dedication and, more importantly, a powerful and feature-rich development platform. Firebase, provided…
Read more